Installing Lemmy on a VPS involves deploying an instance via Docker Compose, configuring a web server (Nginx or Caddy) for reverse proxy and secure HTTPS connection, as well as subsequent maintenance and regular updates for the stable operation of your decentralized community.
What is Lemmy and Why Deploy it on a VPS?
Lemmy is a free and open-source platform for creating self-hosted, decentralized news aggregators and forums, operating on the ActivityPub protocol. Simply put, it's a Reddit alternative where anyone can launch their own server (instance), which can then interact with other instances within a single federated network known as the Fediverse. Users can subscribe to communities, post, comment, and vote, just like on traditional platforms, but with preserved independence and control over their data.
Deploying Lemmy on a VPS gives you full control over your community. You define moderation rules, choose plugins, manage data, and ensure performance. This is an ideal solution for those seeking independence from large corporations and wanting to create a resilient, censorship-resistant space for communication. The ability to host on your own server makes Lemmy self-hosted an attractive choice for enthusiasts and administrators striving for complete autonomy.
Advantages of Self-Hosted Lemmy on a VPS
- Full Control: You own all data, manage server settings, and moderation without third-party interference.
- Flexibility and Scalability: A VPS allows you to easily scale resources (CPU, RAM, disk space) as your community grows, ensuring stable operation even under high load.
- Privacy: You independently define your privacy policy and can guarantee user data protection.
- Unique Domain: The ability to use your own domain for your Lemmy instance, increasing recognition and trust.
- Availability and Performance: A high-quality VPS from Valebyte.com with NVMe drives and fast processors ensures high page loading speed and responsiveness of the Lemmy interface.
Lemmy Architecture: What's Under the Hood?
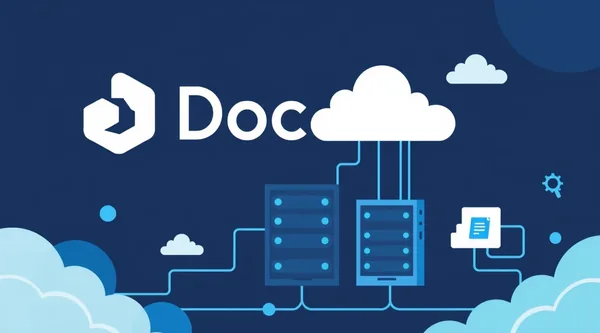
Lemmy consists of several key components, which are typically deployed as Docker containers:
- Backend (lemmy-server): The main application, written in Rust, which handles server logic, database interaction, and ActivityPub.
- Frontend (lemmy-ui): The user interface, written in TypeScript/React, which provides the web interface for users.
- Database (PostgreSQL): Stores all instance data: users, posts, comments, communities, etc.
- Image Processor (Pictrs): A service for uploading and processing images attached to posts and comments.
- Redis (optional): Used for caching and background tasks, improving performance.
It is this modular architecture that makes Lemmy installation via Docker so convenient and recommended.
System Requirements for Lemmy on a VPS: Which Config to Choose?
Choosing the right VPS configuration is critical for the stable and fast operation of your Lemmy instance. Requirements depend on the expected load — the number of active users, posts, and traffic. Lemmy on a server can be quite resource-intensive, especially when processing images and working with the database.
Minimum and Recommended Specifications for Lemmy
- Processor (CPU): Lemmy-server and PostgreSQL actively use the processor. For small instances (up to 50-100 active users), 2 vCPU are sufficient. For medium instances (several hundred) — 4 vCPU. For large instances (thousands and more) — 6-8+ vCPU. Core frequency is also important; modern processors with high clock speeds are preferred.
- Random Access Memory (RAM): PostgreSQL is the primary consumer of RAM. For a minimal instance, 2 GB RAM will be required, but 4 GB RAM is a much more comfortable minimum, especially considering the operating system and Docker. For medium instances, 8 GB RAM is recommended, for large ones — 16 GB RAM or more.
- Disk Space: NVMe drives are mandatory for good database performance. A minimum of 40-60 GB for the OS and initial data volume. However, considering database growth, Pictrs image cache, and logs, it is recommended to start with 100-200 GB NVMe. For active instances with many images and videos, 500 GB or 1 TB will be required.
- Network Bandwidth: For federation and content delivery to users, a stable channel is required. A minimum of 100 Mbit/s, but 1 Gbit/s is standard for most VPS providers, including Valebyte.com, which ensures excellent speed.
Load Estimation and Scaling of a Lemmy Instance
Correct load estimation is key to success. If you plan a small instance for friends or a niche group, a minimal configuration will suffice. However, if you aim for growth and attracting a large number of users, it's always better to build in a safety margin.
As the load grows, you may encounter bottlenecks:
- CPU: Slow request processing, high latency.
- RAM: PostgreSQL starts actively using swap, which drastically slows down performance.
- Disk: Slow read/write operations lead to delays when working with the database and images.
Thanks to the modular architecture and Lemmy Docker, it's relatively easy to scale individual components or migrate them to more powerful servers if needed. For example, you can move the database to a separate VPS with a larger amount of RAM and IOPS.
Valebyte.com Tariff Recommendations for Lemmy
Valebyte.com offers a wide range of VPS tariffs that are perfectly suited for hosting Lemmy. Here are some approximate recommendations:
| Instance Size | CPU | RAM | NVMe Disk | Example Valebyte.com Plan | Approximate Price/Month |
|---|---|---|---|---|---|
| Minimal (up to 50-100 users) | 2 vCPU | 4 GB | 100 GB | Valebyte-Medium | from $15 |
| Medium (100-500 users) | 4 vCPU | 8 GB | 200 GB | Valebyte-Large | from $30 |
| Large (500-2000+ users) | 6-8 vCPU | 16-32 GB | 400-800 GB | Valebyte-XLarge / Custom | from $60 |
For monitoring the performance of your VPS and Lemmy instance, we recommend checking out the article on Netdata on a VPS. This tool will help you identify bottlenecks and respond promptly to increased load.
Looking for a reliable server for your projects?
VPS from $10/month and dedicated servers from $9/month with NVMe, DDoS protection, and 24/7 support.
View offers →Preparing Your VPS for Lemmy Installation: Basic Steps
Before proceeding with Lemmy installation, you need to prepare your VPS. We will use the Ubuntu Server 22.04 LTS operating system, as it is one of the most popular and well-documented for deploying server applications.
OS Selection and Initial Setup
After gaining access to your VPS (usually via SSH), perform the following basic steps:
- System Update: Always start by updating the package manager and installed packages.
sudo apt update && sudo apt upgrade -y - Create a New User (optional, but recommended): Working directly as root is not always secure.
Then log out from root and log in assudo adduser lemmyuser sudo usermod -aG sudo lemmyuserlemmyuser. - Firewall Configuration (UFW): Open only the necessary ports. For Lemmy, these are typically 80 (HTTP), 443 (HTTPS), and 22 (SSH).
Confirm firewall activation.sudo ufw allow OpenSSH sudo ufw allow http sudo ufw allow https sudo ufw enable
Installing Docker and Docker Compose
Lemmy Docker is the simplest and recommended deployment method. Docker Compose allows you to manage multi-container applications using a single configuration file.
- Install Docker Engine:
Install necessary packages:
sudo apt install ca-certificates curl gnupg lsb-release -yAdd Docker's official GPG key:
sudo mkdir -p /etc/apt/keyrings
curl -fsSL https://download.docker.com/linux/ubuntu/gpg | sudo gpg --dearmor -o /etc/apt/keyrings/docker.gpg
Add the Docker repository to APT sources:
echo \
  "deb [arch=$(dpkg --print-architecture) signed-by=/etc/apt/keyrings/docker.gpg] https://download.docker.com/linux/ubuntu \
  $(lsb_release -cs) stable" | sudo tee /etc/apt/sources.list.d/docker.list > /dev/null
Update the package list and install Docker Engine, Docker CLI, and Containerd:
sudo apt update sudo apt install docker-ce docker-ce-cli containerd.io -y - Add user to Docker group: To run Docker commands without
sudo.sudo usermod -aG docker ${USER}Log out of your SSH session and log in again for the changes to take effect, or run
newgrp docker. - Install Docker Compose:
Docker Compose now ships as a Docker plugin. Install it:
sudo apt install docker-compose-plugin -yVerify the installation:
docker compose versionYou should see the Docker Compose version, for example,
Docker Compose version v2.x.x.
Need a dedicated server?
Compare prices from top providers. Configure and order in minutes.
Installing Lemmy on a VPS with Docker Compose: A Step-by-Step Guide
Now that your VPS is ready, let's proceed to the main part — Lemmy installation. We will use official Docker images and the docker-compose.yml file.
Creating a Directory for Lemmy and Obtaining Configuration
Create a directory where all Lemmy files will be stored, and download the example docker-compose.yml file and the configuration file.
mkdir -p ~/lemmy
cd ~/lemmy
wget https://raw.githubusercontent.com/LemmyNet/lemmy/main/docker/docker-compose.yml
wget https://raw.githubusercontent.com/LemmyNet/lemmy/main/docker/lemmy.env
These files will serve as the starting point for your Lemmy installation. Note that the docker-compose.yml file may contain references to the latest versions of Lemmy images.
Configuring Environment Variables in lemmy.env
The lemmy.env file contains important environment variables for configuring Lemmy. Open it for editing:
nano lemmy.envYou will need to change the following parameters:
LEMMY_HOSTNAME: Specify your domain, for example,lemmy.example.com. This is critically important for federation.LEMMY_DATABASE_NAME,LEMMY_DATABASE_USER,LEMMY_DATABASE_PASSWORD: Set strong, unique passwords for the database.LEMMY_SMTP_SERVER,LEMMY_SMTP_PORT,LEMMY_SMTP_USERNAME,LEMMY_SMTP_PASSWORD,LEMMY_SMTP_FROM_ADDRESS: Configure parameters for sending emails (registration confirmation, password reset). This is optional for the first launch but necessary for full functionality. If you don't have an SMTP server, you can use third-party services like SendGrid or Mailgun, or deploy your own, such as Postfix.LEMMY_FEDERATION_SIGNING_PRIVATE_KEY_PATH: Usually not required to change, but ensure the path is correct.
Example of an edited lemmy.env (with placeholders for passwords and domain):
# Lemmy Instance Settings
LEMMY_HOSTNAME=your.lemmy.domain.com
LEMMY_SITE_NAME=My Awesome Lemmy Instance
LEMMY_SITE_DESCRIPTION="A place for awesome discussions."
[email protected]
[email protected]

# Database Settings
LEMMY_DATABASE_NAME=lemmy
LEMMY_DATABASE_USER=lemmy_user
LEMMY_DATABASE_PASSWORD=YOUR_STRONG_DB_PASSWORD_HERE

# Pictrs Settings (Image Uploads)
PICTRS_HOSTNAME=your.lemmy.domain.com # Should be the same as LEMMY_HOSTNAME
PICTRS_API_KEY=YOUR_STRONG_PICTRS_API_KEY_HERE

# SMTP Settings (for email verification, password resets)
LEMMY_SMTP_SERVER=smtp.example.com
LEMMY_SMTP_PORT=587
LEMMY_SMTP_USERNAME=smtp_user
LEMMY_SMTP_PASSWORD=YOUR_SMTP_PASSWORD_HERE
[email protected]
LEMMY_SMTP_SECURITY=tls # or ssl or none

# Other settings
# ... (remaining parameters, as in the original file)
Be sure to replace YOUR_STRONG_DB_PASSWORD_HERE, YOUR_STRONG_PICTRS_API_KEY_HERE, your.lemmy.domain.com, and SMTP data with your own values. For generating strong passwords, you can use online generators or the command openssl rand -base64 32.
First Launch of Lemmy
After configuring lemmy.env, you can start Lemmy. Make sure you are in the ~/lemmy directory where docker-compose.yml is located.
docker compose up -dThis command will download all necessary Docker images (Lemmy, PostgreSQL, Pictrs, Redis) and run them in the background (-d). The process may take several minutes depending on your internet connection speed and VPS performance.
You can check the status of running containers with the command:
docker compose psYou should see all containers in the running state. If a container fails to start, check the logs:
docker compose logs [service_name]For example, docker compose logs lemmy or docker compose logs postgres.
After a successful launch, Lemmy will be accessible at http://localhost:8536 (for frontend) and http://localhost:8537 (for backend) from within the VPS. However, to access it externally via a domain name, we will need to set up a reverse proxy.
Setting up a Reverse Proxy (Nginx or Caddy) and HTTPS for Lemmy
For secure and convenient access to your Lemmy instance from the internet, you need to set up a reverse proxy server and ensure an HTTPS connection using Let's Encrypt. This also allows you to use your own domain, which is key for Lemmy self-hosted.
Option 1: Setting up Nginx as a Reverse Proxy
Nginx is a powerful and widely used web server that is excellent for acting as a reverse proxy. If you have previously worked with Nginx, this option will be familiar to you.
Installing Nginx
sudo apt install nginx -yConfiguring Nginx for Lemmy
Create a new configuration file for your domain:
sudo nano /etc/nginx/sites-available/your.lemmy.domain.com.confInsert the following configuration, replacing your.lemmy.domain.com with your domain:
server {
    listen 80;
    listen [::]:80;
    server_name your.lemmy.domain.com;

    # Redirect HTTP to HTTPS
    return 301 https://$host$request_uri;
}

server {
    listen 443 ssl http2;
    listen [::]:443 ssl http2;
    server_name your.lemmy.domain.com;

    ssl_certificate /etc/letsencrypt/live/your.lemmy.domain.com/fullchain.pem; # Will be created by Certbot
    ssl_certificate_key /etc/letsencrypt/live/your.lemmy.domain.com/privkey.pem; # Will be created by Certbot
    ssl_trusted_certificate /etc/letsencrypt/live/your.lemmy.domain.com/chain.pem; # Will be created by Certbot

    # Recommended SSL settings
    ssl_session_timeout 1d;
    ssl_session_cache shared:SSL:10m;
    ssl_session_tickets off;
    ssl_protocols TLSv1.2 TLSv1.3;
    ssl_ciphers 'ECDHE-ECDSA-AES128-GCM-SHA256:ECDHE-RSA-AES128-GCM-SHA256:ECDHE-ECDSA-AES256-GCM-SHA384:ECDHE-RSA-AES256-GCM-SHA384:ECDHE-ECDSA-CHACHA20-POLY1305:ECDHE-RSA-CHACHA20-POLY1305:DHE-RSA-AES128-GCM-SHA256:DHE-RSA-AES256-GCM-SHA384';
    ssl_prefer_server_ciphers off;
    ssl_stapling on;
    ssl_stapling_verify on;
    add_header Strict-Transport-Security "max-age=63072000" always;
    add_header X-Content-Type-Options "nosniff";
    add_header X-XSS-Protection "1; mode=block";
    add_header X-Frame-Options "SAMEORIGIN";
    add_header Referrer-Policy "no-referrer-when-downgrade";

    # Frontend (UI)
    location / {
        proxy_pass http://localhost:8536;
        proxy_set_header Host $host;
        proxy_set_header X-Real-IP $remote_addr;
        proxy_set_header X-Forwarded-For $proxy_add_x_forwarded_for;
        proxy_set_header X-Forwarded-Proto $scheme;
        proxy_set_header Upgrade $http_upgrade;
        proxy_set_header Connection "upgrade";
        proxy_buffering off;
        proxy_read_timeout 900s;
        client_max_body_size 0; # Allow large uploads
    }

    # Backend (API)
    location /api {
        proxy_pass http://localhost:8537;
        proxy_set_header Host $host;
        proxy_set_header X-Real-IP $remote_addr;
        proxy_set_header X-Forwarded-For $proxy_add_x_forwarded_for;
        proxy_set_header X-Forwarded-Proto $scheme;
        proxy_set_header Upgrade $http_upgrade;
        proxy_set_header Connection "upgrade";
        proxy_buffering off;
        proxy_read_timeout 900s;
        client_max_body_size 0; # Allow large uploads
    }

    # Pictrs (Image Uploads)
    location /pictrs {
        proxy_pass http://localhost:8538;
        proxy_set_header Host $host;
        proxy_set_header X-Real-IP $remote_addr;
        proxy_set_header X-Forwarded-For $proxy_add_x_forwarded_for;
        proxy_set_header X-Forwarded-Proto $scheme;
        proxy_set_header Upgrade $http_upgrade;
        proxy_set_header Connection "upgrade";
        proxy_buffering off;
        proxy_read_timeout 900s;
        client_max_body_size 0; # Allow large uploads
    }

    # Websockets (for real-time updates)
    location /wss {
        proxy_pass http://localhost:8536/wss;
        proxy_set_header Host $host;
        proxy_set_header X-Real-IP $remote_addr;
        proxy_set_header X-Forwarded-For $proxy_add_x_forwarded_for;
        proxy_set_header X-Forwarded-Proto $scheme;
        proxy_set_header Upgrade $http_upgrade;
        proxy_set_header Connection "upgrade";
        proxy_read_timeout 900s;
        proxy_send_timeout 900s;
        proxy_http_version 1.1;
    }
}
Activate the configuration and check the syntax:
sudo ln -s /etc/nginx/sites-available/your.lemmy.domain.com.conf /etc/nginx/sites-enabled/
sudo nginx -t
If there are no errors, restart Nginx:
sudo systemctl restart nginxOption 2: Setting up Caddy as a Reverse Proxy
Caddy is a modern web server that automatically obtains and renews Let's Encrypt SSL certificates, making its configuration much simpler than Nginx. It is ideal for Lemmy on a server if you value simplicity.
Installing Caddy
Install Caddy by following the official instructions for your OS. For Ubuntu:
sudo apt install -y debian-keyring debian-archive-keyring apt-transport-https
curl -1sLf 'https://dl.cloudsmith.io/public/caddy/stable/gpg.key' | sudo gpg --dearmor -o /usr/share/keyrings/caddy-stable-archive-keyring.gpg
curl -1sLf 'https://dl.cloudsmith.io/public/caddy/stable/debian.deb.txt' | sudo tee /etc/apt/sources.list.d/caddy-stable.list
sudo apt update
sudo apt install caddy -y
Configuring Caddy for Lemmy
Create or edit the file /etc/caddy/Caddyfile:
sudo nano /etc/caddy/CaddyfileRemove all existing lines and insert the following configuration, replacing your.lemmy.domain.com with your domain:
your.lemmy.domain.com {
    # Automatic issuance and renewal of SSL certificates
    tls [email protected]

    # Frontend (UI)
    reverse_proxy / http://localhost:8536 {
        header_up Host {host}
        header_up X-Real-IP {remote_ip}
        header_up X-Forwarded-For {remote_ip}
        header_up X-Forwarded-Proto {scheme}
        header_up Upgrade {http.request.header.Upgrade}
        header_up Connection {http.request.header.Connection}
    }

    # Backend (API)
    reverse_proxy /api/* http://localhost:8537 {
        header_up Host {host}
        header_up X-Real-IP {remote_ip}
        header_up X-Forwarded-For {remote_ip}
        header_up X-Forwarded-Proto {scheme}
        header_up Upgrade {http.request.header.Upgrade}
        header_up Connection {http.request.header.Connection}
    }

    # Pictrs (Image Uploads)
    reverse_proxy /pictrs/* http://localhost:8538 {
        header_up Host {host}
        header_up X-Real-IP {remote_ip}
        header_up X-Forwarded-For {remote_ip}
        header_up X-Forwarded-Proto {scheme}
        header_up Upgrade {http.request.header.Upgrade}
        header_up Connection {http.request.header.Connection}
    }

    # Websockets (for real-time updates)
    reverse_proxy /wss http://localhost:8536 {
        header_up Host {host}
        header_up X-Real-IP {remote_ip}
        header_up X-Forwarded-For {remote_ip}
        header_up X-Forwarded-Proto {scheme}
        header_up Upgrade {http.request.header.Upgrade}
        header_up Connection {http.request.header.Connection}
    }

    # Settings for large files (optional, if Pictrs doesn't handle)
    # client_max_body_size 0; # Caddy does not limit size by default
}
Check the Caddy configuration:
sudo caddy validate --config /etc/caddy/CaddyfileIf there are no errors, restart Caddy:
sudo systemctl restart caddyObtaining SSL Certificates with Let's Encrypt (for Nginx)
If you are using Nginx, you will need Certbot to obtain and automatically renew SSL certificates. Caddy does this automatically.
- Install Certbot:
sudo apt install certbot python3-certbot-nginx -y - Obtain Certificate:
sudo certbot --nginx -d your.lemmy.domain.comFollow the on-screen instructions. Certbot will automatically modify your Nginx configuration to use HTTPS. Make sure you provide a valid email for notifications.
- Check Automatic Renewal:
sudo systemctl status certbot.timerThe Certbot timer should be active to automatically renew certificates before they expire.
After configuring the reverse proxy and HTTPS, your Lemmy instance should be accessible at https://your.lemmy.domain.com. Open it in your browser, register the first user (who will become the administrator), and start creating communities!
Maintenance, Backups, and Updates for Lemmy on a VPS
Maintaining Lemmy on a VPS in an up-to-date and operational state requires regular maintenance, reliable backups, and timely updates. These are key aspects for the long-term stability of your instance.
Lemmy Data Backup Strategies
Backups are your insurance against data loss. For Lemmy, two types of data are critically important: the PostgreSQL database and uploaded Pictrs files (images).
PostgreSQL Database Backup
Perform a database dump. Make sure you use the correct username and password that you specified in lemmy.env.
cd ~/lemmy
docker compose exec postgres pg_dumpall -U lemmy_user > lemmy_backup_$(date +%F).sql
This command will create an .sql file with a full database dump. It is recommended to automate this process using cron jobs.
Pictrs File Backup
Pictrs files are stored in a Docker volume. To find the path to this volume, run:
docker volume inspect lemmy_pictrs_dataIn the output, find the Mountpoint field (e.g., /var/lib/docker/volumes/lemmy_pictrs_data/_data). Then you can archive this directory:
sudo tar -czvf lemmy_pictrs_data_backup_$(date +%F).tar.gz /var/lib/docker/volumes/lemmy_pictrs_data/_dataImportant: Backups should not only be stored on the same VPS. Use remote storage (S3, Dropbox, another VPS) or specialized tools. For example, you can use Restic for backups on a VPS to securely and efficiently save data to the cloud.
Lemmy Update Process
Updating Lemmy usually involves updating Docker images and restarting containers. Always check the official Lemmy release notes on GitHub before updating, as additional steps (e.g., database migration) may sometimes be required.
- Create a backup: Before any update, always make a full backup of the database and Pictrs!
- Stop Lemmy:
cd ~/lemmy docker compose down - Download new images and update configuration:
Download fresh versions of
docker-compose.ymlandlemmy.env, comparing them with your current ones. Sometimes, new versions ofdocker-compose.ymlmay change image versions or add new services. Therefore, it's better to download the new files and merge them with your settings (especiallylemmy.env):wget -O docker-compose.yml.new https://raw.githubusercontent.com/LemmyNet/lemmy/main/docker/docker-compose.yml wget -O lemmy.env.new https://raw.githubusercontent.com/LemmyNet/lemmy/main/docker/lemmy.envCompare
docker-compose.yml.newwith yourdocker-compose.ymlandlemmy.env.newwith yourlemmy.envto transfer necessary changes. Pay special attention to Docker image versions indocker-compose.yml.After merging, delete the temporary files:
rm docker-compose.yml.new lemmy.env.new - Update Docker images:
docker compose pullThis command will download the latest versions of all images specified in your
docker-compose.yml. - Start Lemmy with migration:
docker compose up -dDocker Compose will start the containers. The Lemmy server will automatically perform all necessary database migrations on the first launch of the new version.
- Check operation: Open your Lemmy instance in a browser and ensure everything is working correctly.
Monitoring Lemmy Status
Regular monitoring helps identify problems before they become critical. Use:
docker compose ps: For a quick check of container status.docker compose logs -f: For real-time log viewing.htoportop: For monitoring CPU and RAM usage on the VPS.- Prometheus/Grafana: For more advanced monitoring of Lemmy and VPS metrics.
Keep your VPS operating system up-to-date by regularly applying security updates: sudo apt update && sudo apt upgrade -y.
Need a dedicated server?
Compare prices from top providers. Configure and order in minutes.
Advanced Settings and Optimization for Lemmy
After the basic Lemmy installation and ensuring its stable operation, you can consider additional steps for optimization and expanding functionality. This is especially relevant for growing Lemmy server instances.
PostgreSQL Database Optimization
PostgreSQL is the heart of Lemmy, and its performance directly impacts the speed of the entire instance. For optimization, you can:
- Configuring
postgresql.conf:Inside the PostgreSQL container, you can find the configuration file. For Lemmy Docker, it's usually better not to modify it directly in the container but to use Docker volumes or environment variables. However, if you have moved PostgreSQL to a separate host, you can configure parameters such as
shared_buffers,work_mem,maintenance_work_memaccording to the available RAM on your VPS.shared_buffers: Typically 25% of the total server RAM.work_mem: For each session, affects sorting and hash tables.maintenance_work_mem: For VACUUM, CREATE INDEX operations.
After modifying
postgresql.conf, the PostgreSQL container needs to be restarted. - Regular Cleanup (VACUUM):
PostgreSQL uses MVCC, which means old row versions remain visible until they are cleaned up. The regular
VACUUM ANALYZEcommand helps maintain performance by freeing up space and updating query planner statistics.docker compose exec postgres psql -U lemmy_user -d lemmy -c "VACUUM ANALYZE;"PostgreSQL has a built-in autovacuum daemon, but sometimes manual execution can be useful, especially after large operations.
- Indexes: Ensure that all necessary indexes are created and used. Lemmy usually creates them automatically, but when analyzing performance, you can check which queries are slow and need additional indexes.
Setting up a Mail Server for Notifications
As mentioned earlier, configuring an SMTP server in lemmy.env allows Lemmy to send emails for registration confirmation, password resets, and notifications. If you don't want to use a third-party service, you can set up your own mail server on the VPS, for example, Postfix.
Installing and configuring Postfix:
sudo apt install postfix -yDuring installation, select "Internet Site" and specify your domain. After that, configure Postfix to send mail. For more detailed mail server configuration, you can refer to specialized guides.
Ensure that your VPS is authorized to send mail (check SPF, DKIM, DMARC records for your domain) to prevent emails from going to spam.
Using Redis for Caching
The standard docker-compose.yml for Lemmy already includes the Redis service. It is used for data caching and processing background tasks, which significantly improves instance performance, especially under high load. Ensure that Redis is running and Lemmy is connected to it (this usually happens automatically).
Extending Functionality with Third-Party Tools
While Lemmy itself is a complete platform, you can integrate it with other services running on your VPS to extend functionality or improve management. For example, for centralized file management on the server, you might consider Filebrowser on a VPS, which will provide a convenient web interface.
Conclusion
Installing Lemmy on a VPS using Docker Compose is a powerful and flexible way to deploy your own decentralized community. You gain full control over data, high performance thanks to NVMe drives, and scalability. Choosing the right VPS configuration, careful reverse proxy setup, and regular maintenance will ensure the stable and secure operation of your Lemmy instance.
Ready to choose a server?
VPS and dedicated servers in 72+ countries with instant activation and full root access.
Get started now →