
Installing self-hosted GitLab on VPS: SSL, backups, updates
TL;DR
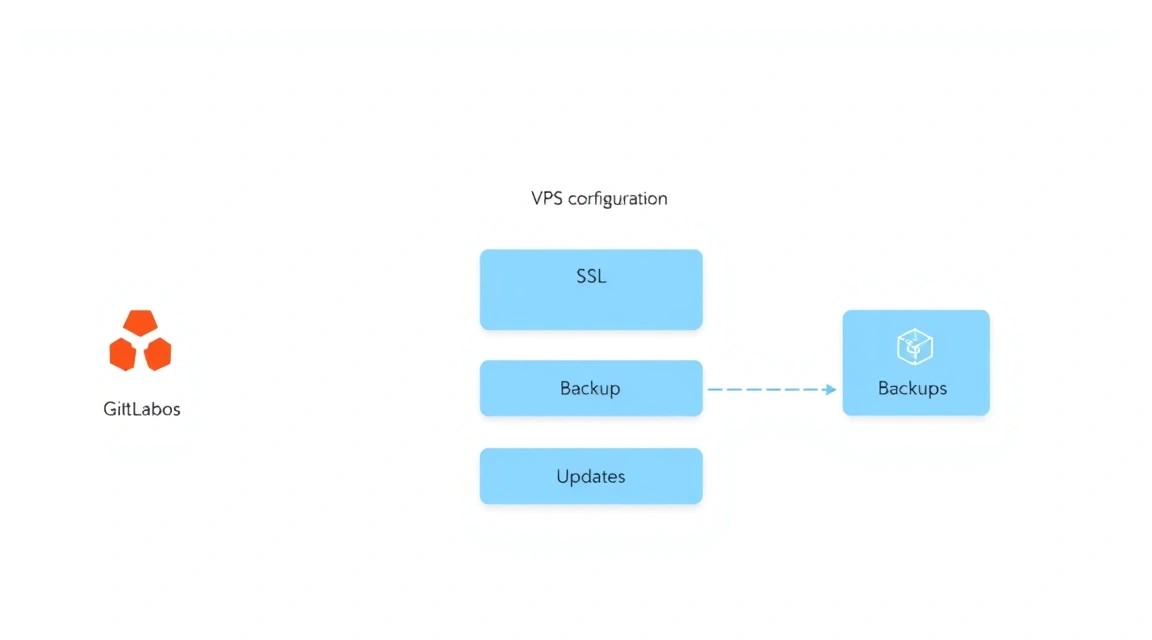
In this detailed guide, we will step-by-step configure a self-hosted GitLab instance on a Virtual Private Server (VPS), ensuring its secure operation with SSL/TLS, automatic backups, and readiness for future updates. You will learn how to choose a suitable VPS, prepare the Ubuntu 24.04 LTS operating system, install GitLab Omnibus, configure HTTPS with Let's Encrypt, and implement a backup strategy so that your code repository and CI/CD pipelines are always available and protected.
- Configuring a secure and performant self-hosted GitLab on Ubuntu 24.04 LTS.
- Integrating HTTPS using Certbot and Let's Encrypt for traffic encryption.
- Implementing automatic GitLab data backups to minimize risks.
- Applying best practices for system maintenance and updates.
- Choosing the optimal VPS or dedicated server configuration for your needs.
What we are setting up and why
In this guide, we will focus on installing and configuring GitLab — a powerful platform for managing the software development lifecycle. GitLab provides a complete set of tools, including Git repository management, issue tracking, CI/CD (Continuous Integration and Continuous Delivery), monitoring, security, and much more. Our goal is to deploy a self-hosted version of GitLab on a Virtual Private Server (VPS), which will give you full control over your data, security, and configuration.
Ultimately, you will get a fully functional GitLab instance, accessible by domain name via a secure HTTPS connection. It will be ready for your team to use for code hosting, project management, and automating development processes. This is an ideal solution for developers, startups, and small teams who require flexibility and privacy not available in public cloud solutions.
Alternatives and choosing self-hosted:
- Cloud-managed GitLab (GitLab.com): This is the easiest way to get started, as GitLab handles all infrastructure, updates, and backups. However, you are limited by pricing plans, do not have full control over your data (it is stored on GitLab's servers), and customization may be restricted. For projects with high security requirements or specific regulations, this may be unacceptable.
- Self-hosted GitLab on VPS: This option gives you maximum control. You choose the server, operating system, configure all components, and are responsible for security and maintenance. This requires technical knowledge but allows you to adapt GitLab to any needs, integrate it with your internal infrastructure, and ensure complete privacy of your data. This is especially relevant if you work with sensitive information or want to have full control over your software supply chain.
The choice in favor of self-hosted GitLab on VPS is driven by the desire for data sovereignty, the possibility of deep integration with other internal services, and long-term cost optimization compared to the ever-increasing costs of cloud services when scaling.
What VPS configuration is needed for this task
GitLab is a fairly resource-intensive application, especially if you plan to actively use CI/CD and host many repositories. The correct choice of VPS configuration is critical to ensuring stable and fast operation.
Minimum requirements for a single user or small team (up to 5 people):
- Processor (CPU): 2 cores (vCPU) with a frequency of 2.5 GHz or higher.
- Random Access Memory (RAM): 4 GB. GitLab is very fond of RAM, and 4 GB is the absolute minimum for the system to run without constant swapping. For comfortable work, 8 GB is recommended.
- Disk: 50 GB SSD. SSD drives significantly accelerate I/O operations, which is critical for databases and working with Git repositories. If many repositories or large files are planned, more space will be required.
- Network: 100 Mbps or 1 Gbps port with unlimited traffic or sufficient volume (from 1 TB/month).
Recommended VPS plan for a team of up to 15-20 people with active CI/CD:
- Processor (CPU): 4 cores (vCPU) with a frequency of 2.8 GHz or higher.
- Random Access Memory (RAM): 8 GB or 16 GB. This will ensure stable operation of all GitLab components, including PostgreSQL, Redis, and Gitaly, and allow several CI/CD pipelines to run simultaneously.
- Disk: 100-200 GB NVMe SSD. NVMe provides even higher read/write speeds, which will significantly accelerate work with large repositories and projects.
- Network: 1 Gbps port with unlimited traffic.
For renting a VPS with the specified characteristics, for example, 4 vCPU, 8-16 GB RAM, 100-200 GB NVMe SSD, you can consider provider offers. A suitable option can be found here: VPS with specified characteristics.
When do you need a dedicated server, not a VPS?
A dedicated server becomes necessary if:
- Large team (more than 50 users): GitLab with a large number of active users and CI/CD tasks can consume significant resources.
- High performance requirements: For very active CI/CD pipelines, large monorepositories, or specific workloads.
- Specific security/isolation requirements: If you need complete isolation from other provider clients, a dedicated server provides this.
- Need for custom hardware: For specific tasks (e.g., GPU for machine learning in CI/CD), direct hardware management may be required.
If you encounter such needs, consider the possibility of getting a dedicated server.
Location: what it affects
The choice of the geographical location of the VPS server affects several key aspects:
- Latency: The closer the server is to your team and end-users, the lower the latency. This is critical for comfortable work with Git, fast loading of the web interface, and execution of CI/CD tasks.
- Legislation: The server's location determines the applicable data legislation. This is important for compliance with regulations such as GDPR, HIPAA, or local data retention laws.
- Cost: VPS prices may vary depending on the region.
It is recommended to choose a location as close as possible to the main part of your development team.
Server preparation
Before proceeding with GitLab installation, it is necessary to perform basic operating system setup. We will use Ubuntu Server 24.04 LTS, as it is the current long-term version, supported until 2029.
1. SSH connection and creating a new user
After receiving the VPS access details (usually IP address, root login, and password), connect to the server:
ssh root@YOUR_IP_ADDRESS
Create a new user with sudo privileges for daily work. Replace your_user with the desired name:
# Add a new user
adduser your_user

# Add user to the sudo group
usermod -aG sudo your_user
Now, exit the root session and log in as the new user:
exit
ssh your_user@YOUR_IP_ADDRESS
2. SSH key setup (recommended)
For increased security, it is recommended to use SSH keys instead of passwords. If you don't have keys yet, generate them on your local machine:
# On your local machine
ssh-keygen -t rsa -b 4096 -C "[email protected]"
Then copy the public key to the server:
# On your local machine
ssh-copy-id your_user@YOUR_IP_ADDRESS
After this, you can disable password authentication for root in the /etc/ssh/sshd_config file. Find the lines:
# PermitRootLogin prohibit-password
# PasswordAuthentication yes
And change them to:
PermitRootLogin no
PasswordAuthentication no
Restart the SSH service:
# On the server, as your_user
sudo systemctl restart sshd
3. System update and installation of basic utilities
Ensure that the system is up-to-date and necessary packages are installed:
# Update package list
sudo apt update

# Upgrade all installed packages
sudo apt upgrade -y

# Install necessary utilities
sudo apt install -y curl wget gnupg2 ca-certificates apt-transport-https htop git unattended-upgrades
Unattended Upgrades: This package automatically installs critical security updates, which is extremely important for keeping the server up-to-date and secure.
4. Firewall configuration (UFW)
Let's configure the basic UFW (Uncomplicated Firewall) to protect the server. By default, we will allow only SSH, HTTP, HTTPS:
# Allow SSH (default port 22)
sudo ufw allow ssh

# Allow HTTP (port 80)
sudo ufw allow http

# Allow HTTPS (port 443)
sudo ufw allow https

# Enable firewall
sudo ufw enable
Confirm firewall activation by pressing y. You can check the status with the command sudo ufw status.
5. Installing Fail2ban (bruteforce protection)
Fail2ban scans logs and automatically bans IP addresses that show signs of malicious activity (e.g., multiple failed SSH login attempts).
# Install Fail2ban
sudo apt install -y fail2ban

# Start and enable Fail2ban autostart
sudo systemctl enable fail2ban
sudo systemctl start fail2ban
Create a configuration file for Fail2ban so that it is not overwritten during updates:
sudo cp /etc/fail2ban/jail.conf /etc/fail2ban/jail.local
Open /etc/fail2ban/jail.local and configure, for example, bantime (ban time) and findtime (period for detecting attempts) to your needs. Make sure the [sshd] section is enabled (enabled = true).
# Example configuration in /etc/fail2ban/jail.local
[DEFAULT]
bantime = 1h
findtime = 10m
maxretry = 5

[sshd]
enabled = true
port = ssh
logpath = %(sshd_log)s
backend = %(sshd_backend)s
Restart Fail2ban to apply changes:
sudo systemctl restart fail2ban
Now your server is ready for GitLab installation.
Software Installation — Step-by-Step
We will install GitLab Community Edition (CE) using the Omnibus package, which includes all necessary components (NGINX, PostgreSQL, Redis, etc.) and significantly simplifies the installation and maintenance process. For 2026, we will target GitLab version 20.x, which will be current at that time.
Before installation, make sure you have a domain name pointing to your VPS's IP address. For example, gitlab.yourdomain.com.
1. Installing Dependencies
Several packages are required to add the GitLab repository:
# Install packages required to add the GitLab repository
sudo apt update
sudo apt install -y apt-transport-https ca-certificates curl gnupg2
2. Adding the GitLab Repository
Import the GitLab GPG key and add the official Omnibus package repository:
# Add GitLab GPG key
curl https://packages.gitlab.com/gpg.key | sudo gpg --dearmor > /usr/share/keyrings/gitlab-archive-keyring.gpg

# Add GitLab CE repository for Ubuntu 24.04 (Noble Numbat)
echo "deb [signed-by=/usr/share/keyrings/gitlab-archive-keyring.gpg] https://packages.gitlab.com/gitlab/gitlab-ce/ubuntu noble main" | sudo tee /etc/apt/sources.list.d/gitlab-ce.list
Update the package list after adding the new repository:
# Update package list
sudo apt update
3. Installing GitLab Community Edition
Now you can install GitLab. In the installation command, we will specify the external URL that GitLab will use to generate links and configure NGINX. Replace gitlab.yourdomain.com with your domain.
# Install GitLab CE with external URL specified
sudo EXTERNAL_URL="https://gitlab.yourdomain.com" apt install gitlab-ce
This command will install the latest stable version of GitLab CE available in the repository. The process may take some time as many components will be downloaded and installed.
4. Initial Setup and Reconfiguration
After installation, GitLab will automatically start the reconfiguration process, which will set up all components. If you did not specify EXTERNAL_URL during installation or want to change any settings, you can do so in the /etc/gitlab/gitlab.rb file.
If you need to reconfigure GitLab manually (e.g., after changing gitlab.rb):
# Start the GitLab reconfiguration process
sudo gitlab-ctl reconfigure
This command will re-read the gitlab.rb file and apply all changes, and also ensure that all GitLab services are running and configured correctly.
5. Checking GitLab Service Status
Ensure that all GitLab components are running and working correctly:
# Check the status of all GitLab services
sudo gitlab-ctl status
You should see a list of services (nginx, postgresql, redis, unicorn, sidekiq, gitaly, etc.) with a run status.
6. Setting the Password for the GitLab Root User
Upon first installation, GitLab generates a temporary password for the root user. You can find it in the /etc/gitlab/initial_root_password file, which exists for only 24 hours after installation.
# View temporary root password
sudo cat /etc/gitlab/initial_root_password
It is recommended to immediately set a new, strong password via the web interface or through the Rails console:
# Start GitLab Rails console
sudo gitlab-rails console

# Inside the Rails console
user = User.where(id: 1).first
user.password = 'YOUR_NEW_STRONG_PASSWORD'
user.password_confirmation = 'YOUR_NEW_STRONG_PASSWORD'
user.save!

# Exit console
exit
Now you can access the GitLab web interface at https://gitlab.yourdomain.com, using the login root and your new password.
Configuration
The main configuration file for GitLab Omnibus is /etc/gitlab/gitlab.rb. After any changes to this file, you must run sudo gitlab-ctl reconfigure to apply them.
1. Basic GitLab Configuration (/etc/gitlab/gitlab.rb)
Open the gitlab.rb file for editing:
sudo nano /etc/gitlab/gitlab.rb
Find and uncomment/change the following lines:
# External URL of your GitLab instance. This should be configured during installation, but make sure.
external_url 'https://gitlab.yourdomain.com'

# Disable built-in NGINX if you use an external proxy (not our case)
# nginx['enable'] = true # Enabled by default

# Email settings for notifications (required for operation)
# Replace with your SMTP server details
gitlab_rails['smtp_enable'] = true
gitlab_rails['smtp_address'] = "smtp.your-email-provider.com"
gitlab_rails['smtp_port'] = 587
gitlab_rails['smtp_user_name'] = "[email protected]"
gitlab_rails['smtp_password'] = "YOUR_EMAIL_PASSWORD"
gitlab_rails['smtp_domain'] = "yourdomain.com"
gitlab_rails['smtp_authentication'] = "login"
gitlab_rails['smtp_enable_starttls_auto'] = true
gitlab_rails['smtp_tls'] = false # Set to true if your provider requires TLS

gitlab_rails['gitlab_email_from'] = '[email protected]'
gitlab_rails['gitlab_email_display_name'] = 'GitLab'

# Backup settings (will be covered in more detail in the backups section)
gitlab_rails['backup_path'] = "/var/opt/gitlab/backups"
gitlab_rails['backup_keep_time'] = 604800 # 7 days in seconds
After making changes, save the file and perform a reconfiguration:
sudo gitlab-ctl reconfigure
2. Configuring TLS/HTTPS with Certbot (Let's Encrypt)
To ensure a secure HTTPS connection, we will use Certbot to obtain free SSL/TLS certificates from Let's Encrypt. GitLab Omnibus has built-in support for Let's Encrypt, which greatly simplifies the process.
In the /etc/gitlab/gitlab.rb file, find the following lines and ensure they are configured:
# Enable automatic Let's Encrypt certificate management
letsencrypt['enable'] = true
letsencrypt['contact_emails'] = ['[email protected]'] # Be sure to specify your email
letsencrypt['auto_renew_hour'] = 12 # Hour for daily renewal attempt
letsencrypt['auto_renew_minute'] = 30 # Minute for daily renewal attempt
letsencrypt['auto_renew_day_of_month'] = "*/7" # Once every 7 days

# Enable HTTP to HTTPS redirection (recommended)
nginx['redirect_http_to_https'] = true
Save the file and run the reconfiguration again:
sudo gitlab-ctl reconfigure
GitLab will automatically attempt to obtain and install the certificate. If you encounter problems, ensure that:
- Your domain (
gitlab.yourdomain.com) correctly points to your VPS's IP address. - Ports 80 (HTTP) and 443 (HTTPS) are open in your firewall (UFW).
3. Verifying Functionality
After configuration and reconfiguration, ensure that GitLab is working correctly:
-
Web Interface Access: Open
https://gitlab.yourdomain.comin your browser. You should see the GitLab login page. Verify that the connection is secure (green padlock in the address bar). -
HTTP Redirect Check: Try accessing
http://gitlab.yourdomain.com. You should be automatically redirected to the HTTPS version. -
GitLab Status Check:
# Check main GitLab services
sudo gitlab-ctl status

# Run built-in GitLab health check
sudo gitlab-rake gitlab:check SANITIZE=true
The
gitlab-rake gitlab:checkcommand will perform a series of checks that will show potential problems with configuration, permissions, or the database. If there are errors, read them carefully and follow the recommendations. -
Port Check:
# Check that NGINX is listening on ports 80 and 443
sudo netstat -tulnp | grep -E ':(80|443)'
At this stage, your self-hosted GitLab should be fully functional and accessible via a secure connection.
Backups and Maintenance
Backup is a critically important part of any production system. GitLab has built-in mechanisms for creating backups that allow you to save all data: Git repositories, databases, uploaded files, configuration, and secrets.
1. What to Back up
GitLab Omnibus includes everything necessary. The GitLab backup command by default saves:
- PostgreSQL Database
- Git Repositories
- Uploaded files (avatars, attachments)
- Configuration files (not all, but the main ones)
- Secrets (encryption keys)
Important: The file /etc/gitlab/gitlab.rb and the directory /etc/gitlab/ssl/ (if you are using custom certificates) are not included in the standard GitLab backup. They should be backed up separately.
2. Simple Auto-backup Script
GitLab provides a convenient command for creating backups. You can configure it to run via cron.
Step 1: Creating a Backup Manually
# Create a full GitLab backup
sudo gitlab-rake gitlab:backup:create
Backups are saved by default in /var/opt/gitlab/backups/. Files have the format [TIMESTAMP]_gitlab_backup.tar.
Step 2: Setting up Automatic Backup with Cron
Open the cron table for editing:
sudo crontab -e
Add the following line for GitLab to create a backup every day at 02:00 AM:
# Daily GitLab backup at 02:00 AM
0 2    sudo gitlab-rake gitlab:backup:create CRON=1
The CRON=1 option suppresses interactive prompts and makes the output more concise, which is convenient for automated tasks.
Step 3: Backing up Configuration Files
Create a separate script for backing up gitlab.rb and other important files:
sudo mkdir -p /var/opt/gitlab/config_backups
sudo nano /usr/local/bin/gitlab_config_backup.sh
Add the following content to the file:
#!/bin/bash
TIMESTAMP=$(date +%F_%H-%M-%S)
BACKUP_DIR="/var/opt/gitlab/config_backups"
CONFIG_FILES="/etc/gitlab/gitlab.rb /etc/gitlab/gitlab-secrets.json /etc/gitlab/ssl" # Add other important files/folders

# Creating an archive with configuration files
sudo tar -czf "$BACKUP_DIR/${TIMESTAMP}_gitlab_config.tar.gz" $CONFIG_FILES

# Deleting old backups (e.g., older than 7 days)
find "$BACKUP_DIR" -type f -name ".tar.gz" -mtime +7 -delete

echo "GitLab configuration backup created: $BACKUP_DIR/${TIMESTAMP}_gitlab_config.tar.gz"
Make the script executable:
sudo chmod +x /usr/local/bin/gitlab_config_backup.sh
Add it to crontab (e.g., at 02:30 AM):
# Daily GitLab configuration backup at 02:30 AM
30 2    sudo /usr/local/bin/gitlab_config_backup.sh
3. Where to Store Backups
Storing backups on the same server as the main GitLab instance is extremely risky. If the server is lost, you will also lose your backups. It is recommended to use external storage:
-
S3-compatible cloud storage: AWS S3, DigitalOcean Spaces, Backblaze B2. GitLab Omnibus supports direct upload of backups to S3. To do this, edit
/etc/gitlab/gitlab.rb:# Enable S3 backup uploads gitlab_rails['backup_upload_connection'] = { 'provider' => 'AWS', 'region' => 'us-east-1', # Replace with your S3 region 'aws_access_key_id' => 'ВАШ_AWS_ACCESS_KEY_ID', 'aws_secret_access_key' => 'ВАШ_AWS_SECRET_ACCESS_KEY' } gitlab_rails['backup_upload_remote_directory'] = 'gitlab-backups' # Your S3 bucket nameAfter making changes, run
sudo gitlab-ctl reconfigure. -
Separate VPS: You can set up a second, small VPS and use
rsyncorscpto regularly transfer backups from the main server to it. - NAS/local server: If you have your own hardware, you can set up network storage.
Important: Use separate credentials (IAM user) for S3 with minimal permissions (write-only to the specified bucket).
4. Updates: rolling vs maintenance window
Regular GitLab updates are critical for security and new features. GitLab releases new versions monthly (major.minor.patch).
- Rolling updates (not recommended for GitLab): This is an approach where updates are applied immediately as they are released. For GitLab, this is dangerous, as each update may contain database or configuration changes that require attention.
-
Maintenance window: The recommended approach. Plan a regular maintenance window (e.g., once a month) for updating GitLab. This allows you to prepare, create a backup, and quickly roll back in case of problems.
# Stop GitLab before updating
sudo gitlab-ctl stop

# Update system and GitLab
sudo apt update
sudo apt upgrade -y gitlab-ce

# Start GitLab after updating
sudo gitlab-ctl start

# Reconfigure (sometimes required after major updates)
sudo gitlab-ctl reconfigure

# Check status
sudo gitlab-ctl status
sudo gitlab-rake gitlab:check
Always read the official GitLab update instructions for your specific version, as there may be specific steps between major versions.
Troubleshooting + FAQ
What to do if GitLab does not start after a reboot?
First, check the logs. The main GitLab logs are located in /var/log/gitlab/. Start with gitlab-rails/production.log, nginx/gitlab_access.log, nginx/gitlab_error.log, and gitlab-shell/gitlab-shell.log. Also, run sudo gitlab-ctl status to see which services are not running. Often, the problem is related to insufficient memory or incorrect configuration in /etc/gitlab/gitlab.rb. Try running sudo gitlab-ctl reconfigure and sudo gitlab-ctl restart.
Cannot obtain an SSL certificate from Let's Encrypt. What is the problem?
The most common reasons are: 1) Incorrectly configured DNS record for your domain — make sure the A-record points to your VPS's IP address. 2) Port 80 or 443 is blocked by a firewall (UFW or VPS provider's firewall). Make sure sudo ufw status shows allow 80/tcp and allow 443/tcp. 3) Another process is already listening on port 80 or 443. Check sudo netstat -tulnp | grep -E ':(80|443)'. 4) Errors in /etc/gitlab/gitlab.rb, for example, an incorrect external_url or contact_emails not specified for Let's Encrypt.
What is the minimum suitable VPS configuration?
For a single user or a very small team (up to 3-5 people) with minimal activity and without intensive CI/CD, a minimally acceptable VPS should have 2 CPU cores, 4 GB RAM, and 50 GB SSD. However, for more comfortable and stable operation, especially if CI/CD is planned, 4 CPU cores, 8 GB RAM, and 100 GB NVMe SSD are highly recommended. Lower parameters will lead to constant slowdowns and failures due to resource shortages.
What to choose — VPS or dedicated for this task?
The choice between a VPS and a dedicated server depends on the scale of your team and the intensity of GitLab usage. For most small and medium teams (up to 50-70 people) with moderate CI/CD, a well-configured VPS (e.g., 8-16 GB RAM, 8 vCPU, 200+ GB NVMe SSD) will be more than sufficient and cost-effective. A dedicated server becomes preferable for very large teams (hundreds of users), high-load CI/CD pipelines, specific I/O performance requirements, or complete physical resource isolation. In any case, start with a VPS and scale up to dedicated if performance issues arise.
How to change the maximum file upload size?
The maximum file upload size in GitLab is limited by default. To change it, edit /etc/gitlab/gitlab.rb. Find or add the following lines:
# Increase NGINX upload limit to 2048MB (2GB)
nginx['client_max_body_size'] = '2048m'

# Increase Git limit (for large LFS files)
gitlab_rails['gitlab_shell_git_max_size'] = 2048000 # In KB, 2GB
After saving the file, run sudo gitlab-ctl reconfigure.
How to update GitLab to a new version?
The update process involves several steps. First, make a full GitLab backup. Then stop GitLab services: sudo gitlab-ctl stop. Update system packages and GitLab: sudo apt update && sudo apt upgrade -y gitlab-ce. After the update, start GitLab: sudo gitlab-ctl start and perform a reconfiguration: sudo gitlab-ctl reconfigure. Always check the official GitLab update documentation for your specific version, as there may be additional steps between major versions.
Conclusions and Next Steps
Congratulations! You have successfully installed and configured self-hosted GitLab on your VPS, secured it with SSL/TLS, and implemented a backup strategy. Now you have a powerful and flexible platform for managing your development projects, version control, and automating CI/CD processes, fully under your control.
Here are a few steps you can take next:
- GitLab CI/CD Setup: Explore GitLab CI/CD capabilities to automate the build, testing, and deployment of your applications. Configure GitLab Runner on a separate server or in a Docker container for isolation and scaling of CI/CD tasks.
- Integration with External Services: Connect GitLab to your existing tools, such as task tracking systems (Jira), external artifact storage, or monitoring systems.
- Performance Monitoring: Implement monitoring tools (e.g., Prometheus and Grafana) to track the health and performance of your GitLab instance, to promptly react to potential issues and plan for scaling.