
Installing Coolify on a VPS: Deploying Your Own PaaS Platform for Managing Docker Containers and GitOps
TL;DR
In this guide, we look at the process of turning a regular Linux server into a powerful PaaS (Platform as a Service) platform using Coolify. This solution allows you to automate application deployment from Git repositories, manage Docker containers through a user-friendly web interface, automatically issue SSL certificates, and set up databases in one click, completely replacing expensive cloud services like Heroku or Netlify.
- Goal: Creating an independent infrastructure for hosting web applications and databases.
- Tools: Coolify v4+, Docker Engine, Traefik (built-in), Ubuntu 24.04/26.04 LTS.
- Result: A fully automated deployment pipeline (GitOps) with support for GitHub, GitLab, and local Docker images.
- Complexity: Intermediate (basic SSH terminal skills required).
- Implementation Time: 30-40 minutes for basic setup.
Need a dedicated server?
Compare prices from top providers. Configure and order in minutes.
1. What We Are Setting Up and Why: The Evolution of Self-hosted PaaS
Modern software development requires high iteration speed. The traditional approach, where a developer manually configures an Nginx web server, manually copies files via SCP, or sets up complex CI/CD pipelines in Jenkins, is gradually becoming a thing of the past for small and medium-sized projects. PaaS (Platform as a Service) solutions like Heroku, Render, or Fly.io have taken their place. However, their cost grows exponentially with resource consumption, and vendor lock-in creates risks for the business.
Coolify is an open-source alternative that provides a similar user experience but on your own hardware. It is a "control panel" that is installed on your VPS and takes care of all the routine application lifecycle management.
Key benefits of moving to a self-hosted PaaS in 2026:
- Savings: You only pay for the VPS "hardware" without overpaying for every build or additional gigabyte of RAM.
- Privacy: Your source code, environment variables, and databases stay only on your servers.
- Flexibility: The ability to deploy almost any stack (Node.js, Python, Go, Rust, PHP) without cloud provider restrictions.
- Automation: Built-in Wildcard SSL support via Let's Encrypt and automatic deployment upon pushing to a Git branch.
For a developer, this means the ability to focus on code rather than configuring YAML files for Kubernetes, which is often overkill for 90% of projects.
2. What VPS Configuration is Needed for This Task
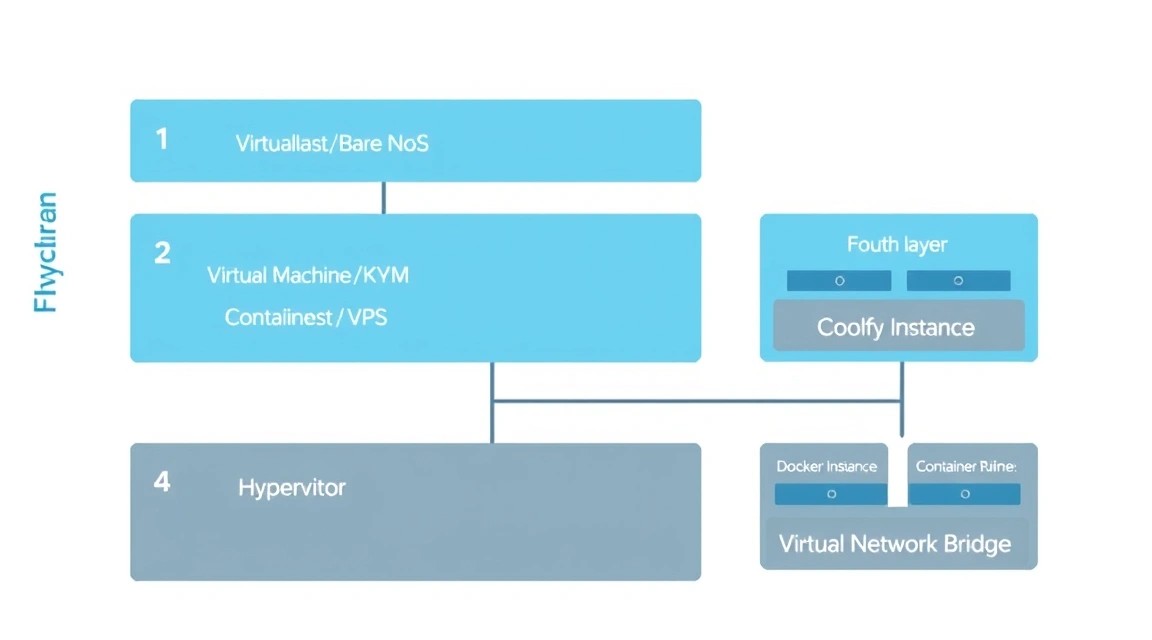
Coolify itself is a relatively lightweight application as it works as an orchestrator on top of Docker. The main resource consumption will depend on the number and "weight" of the applications you plan to run within the platform.
Since Coolify uses Docker and the built-in Traefik reverse proxy, RAM is a critical resource. If RAM is insufficient, the Linux OOM Killer mechanism may start terminating Coolify processes or your databases.
| Characteristic | Minimum (for testing) | Recommended (Production) | Enterprise / High Load |
|---|---|---|---|
| CPU | 1 Core (x86_64/ARM) | 2-4 Cores | 8+ Cores |
| RAM | 2 GB | 4-8 GB | 16 GB+ |
| Disk (SSD/NVMe) | 20 GB | 50-100 GB | 500 GB+ |
| OS | Ubuntu 22.04 LTS | Ubuntu 24.04 LTS | Debian 12 / Ubuntu 26.04 |
For stable platform operation and several database containers (PostgreSQL, Redis), it is best to choose a suitable VPS with at least 4 GB of RAM. If you plan to run heavy Java applications or compile large Rust/C++ projects directly on the server, you should consider moving to dedicated resources.
Important note on architecture: Coolify works great on ARM processors (e.g., Ampere). This allows for significant budget savings, as ARM instances are usually cheaper for the same performance in multi-threaded tasks.
Location: Choose a data center as close as possible to your target audience to minimize network latency for HTTP requests. If your project is aimed at a global market, Coolify allows you to connect additional servers (Remote Servers) in different locations and manage them from a single panel.
3. Server Preparation: Security and Dependencies
Before installing Coolify, it is necessary to basically secure the server and prepare the environment. We assume you have a clean installation of Ubuntu 24.04 LTS.
System Update
First, let's update the packages to the latest versions:
sudo apt update && sudo apt upgrade -yFirewall Configuration (UFW)
Coolify requires opening certain ports for the web interface, SSH access, and incoming traffic to your future applications. We need 80 (HTTP), 443 (HTTPS), 22 (SSH), and 6001 (Websockets for real-time logs in the panel).
sudo ufw allow 22/tcp
sudo ufw allow 80/tcp
sudo ufw allow 443/tcp
sudo ufw allow 6001/tcp
sudo ufw enable
User Creation and SSH Keys
Working as the root user is not recommended. Let's create a user with sudo privileges:
useradd -m -s /bin/bash deployer
usermod -aG sudo deployer
passwd deployer
Be sure to set up SSH key login and disable password authentication in /etc/ssh/sshd_config to prevent brute-force attacks.
Installing Basic Utilities
We will need curl, wget, and git for the installation scripts to work:
sudo apt install -y curl wget git jq htopNeed a dedicated server?
Compare prices from top providers. Configure and order in minutes.
4. Installing Coolify: A Step-by-Step Breakdown of the Script
Coolify v4 (the current stable version as of 2026) is installed using an official script that automatically configures Docker Engine, Docker Compose, and the necessary network configurations.
Run the following command as a user with sudo privileges:
curl -fsSL https://cdn.coollabs.io/coolify/install.sh | bashWhat happens during script execution:
- Dependency Check: The script checks for the presence of curl, jq, and other utilities.
- Docker Installation: If Docker is not installed, the script will add the official Docker repository and install the latest version of the Engine and Compose plugin.
- Directory Structure Creation: All Coolify data is stored in
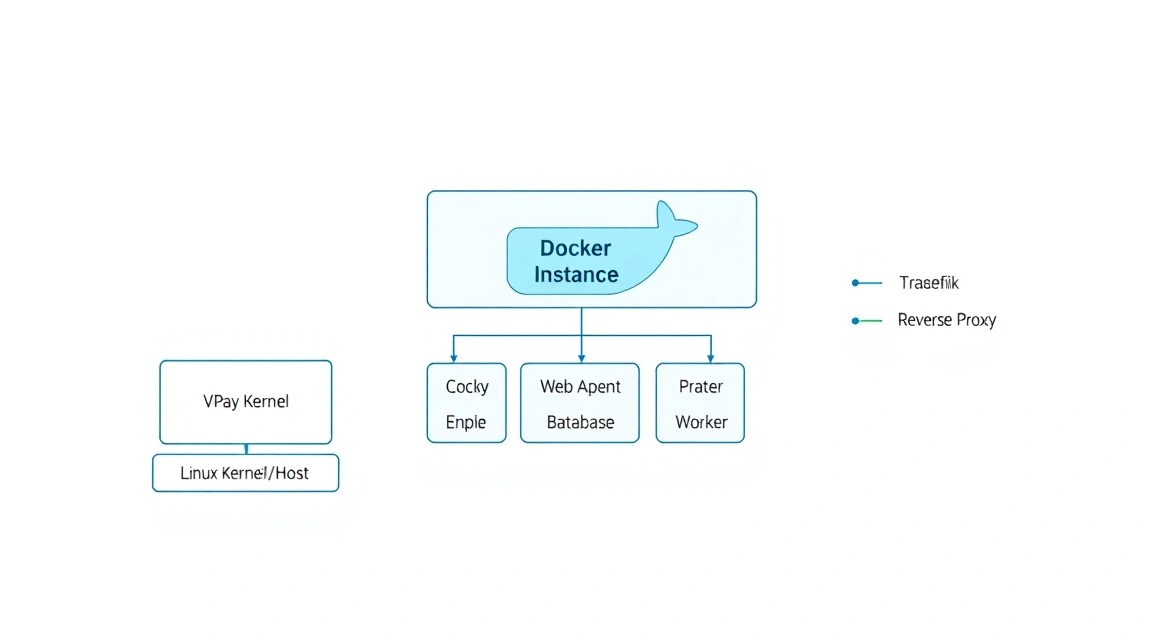
/data/coolify. This is important for subsequent backups. - Launching Coolify Containers: Several containers will be downloaded and launched:
coolify: The main Laravel application (backend).coolify-realtime: A Node.js service for transmitting logs via sockets.coolify-db: A PostgreSQL database for storing platform settings.coolify-redis: Caching and task queues.coolify-proxy: A Traefik instance that will manage routing.
After the installation is complete (usually takes 3-5 minutes), you will see a message with the IP address and port for login (default is 3000, but after domain configuration, it will be switched to 80/443).
You can check the status of the running containers with the command:
docker ps | grep coolify5. Initial Configuration and Dashboard
Open your browser and go to http://your-vps-ip:3000. Upon your first login, you will be prompted to create an administrator account. This data is stored locally on your server.
Configuring a Domain for the Control Panel
To make your panel accessible via a secure address (e.g., https://cp.yourdomain.com), follow these steps:
- Point your domain's A-record in your registrar's DNS panel to your VPS IP address.
- In the Coolify interface, go to the Settings section.
- In the Instance Domain field, enter your domain.
- Coolify will automatically request an SSL certificate from Let's Encrypt via the built-in Traefik.
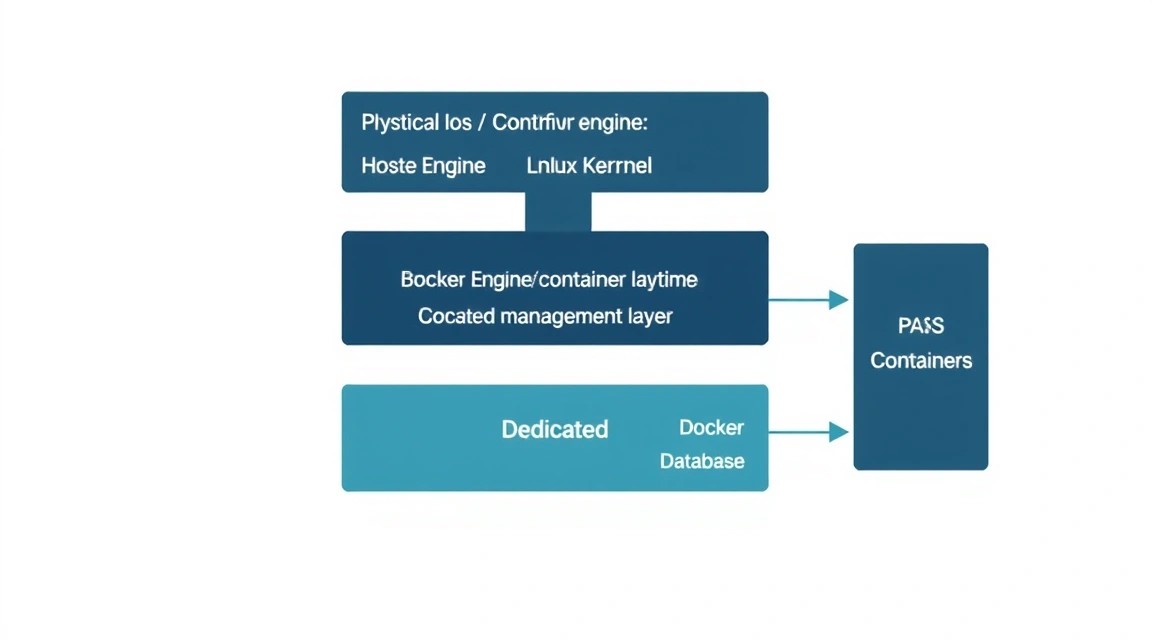
Understanding "Destinations" and "Sources"
Coolify operates with two important entities:
- Sources: Where the code comes from (GitHub, GitLab, Bitbucket, local Git).
- Destinations: Where the code is deployed. By default, this is Local Docker (the same server where the panel is installed), but you can add other servers via SSH.
Important: When adding a remote server via SSH, make sure Docker is also installed on it. Coolify can do this automatically if it has root access.
6. GitOps Setup: Integration with GitHub and GitLab
One of the most powerful features of Coolify is automatic deployment on every git push. This is implemented via Webhooks.
Connecting GitHub App
Instead of using Personal Access Tokens (PAT), Coolify recommends creating a GitHub App. This is more secure and provides more control over access rights.
- In the Coolify panel, select Sources -> New -> GitHub App.
- Click the automatic app generation button. You will be redirected to GitHub.
- Select an organization or personal account and confirm the installation.
- Now, when creating a new project (New Resource), you can simply select a repository from the list.
Automatic Previews (Pull Request Previews)
Coolify supports creating temporary environments for each Pull Request. When a developer opens a PR, Coolify deploys a separate copy of the application on a temporary subdomain (e.g., pr-12.myapp.com). This allows testing features before merging them into the main branch. After the PR is closed, the container is automatically deleted, freeing up resources.
Dockerfile vs Nixpacks Configuration
Coolify uses Nixpacks — a modern tool that analyzes your code and automatically understands how to build it (detects the programming language, runtime version, and necessary dependencies). If you need full control, you can always switch to using your own Dockerfile or docker-compose.yaml in the project settings.
Need a dedicated server?
Compare prices from top providers. Configure and order in minutes.
7. One-click Database and Service Management
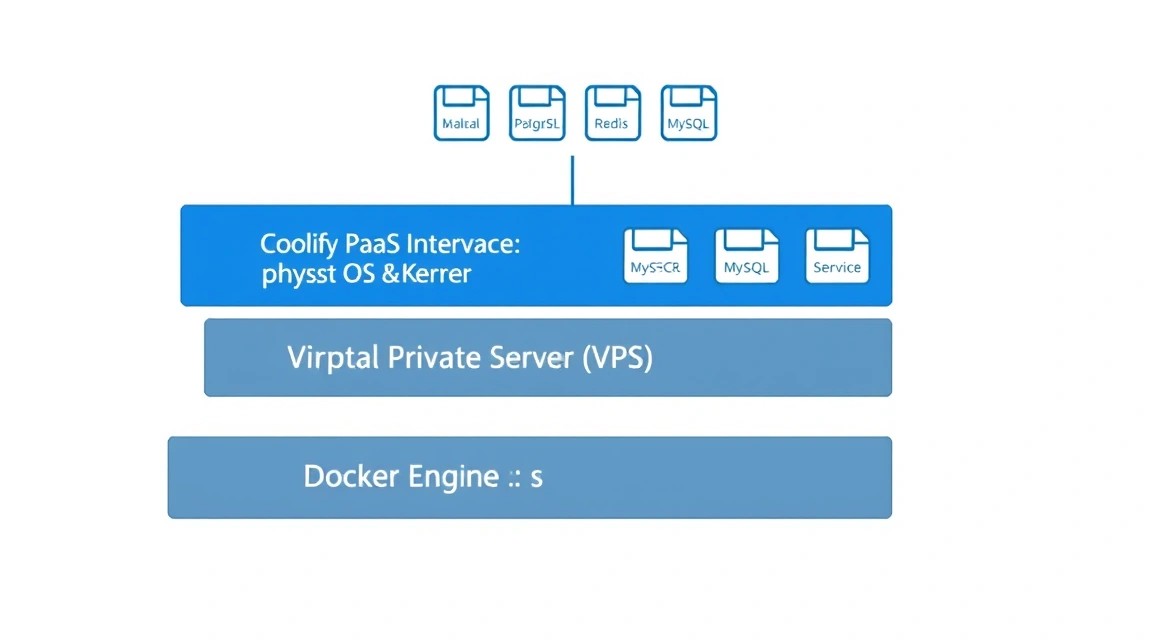
Coolify allows you to deploy databases not as external dependencies, but as full-fledged resources within your PaaS. Supported databases include:
- PostgreSQL
- MySQL / MariaDB
- MongoDB
- Redis
- ClickHouse
- Dragonfly / Valkey
When creating a database, Coolify automatically generates strong passwords and provides internal DNS names (e.g., postgres:5432), which are accessible to your other applications within the same Docker network. This eliminates the need to expose database ports to the outside world, significantly increasing security.
One-click Services
In the Services section, ready-made templates for popular Open Source tools are available: Appwrite, Plausible Analytics, Ghost, Meilisearch, WordPress and many others. Installation happens in one click, including database and proxy configuration.
8. Backups and System Maintenance
Storing data on a single server without backups is a huge risk. Coolify offers built-in database backup mechanisms.
Setting up S3 Backups
It is recommended to use any S3-compatible storage for backups. In the database section, go to the Backups tab:
- Specify S3 Access Key, Secret Key and Bucket Name.
- Set up a schedule (Cron expression), for example,
0 0 *for a daily backup at midnight. - Specify the number of stored copies (Retention policy).
Backing up the Coolify Platform itself
All critical Coolify data is located in /data/coolify. For a full system backup, you can use a simple script based on rsync or restic:
#!/bin/bash
# Example of backing up the data folder to a remote server
tar -czf /tmp/coolify-data-$(date +%F).tar.gz /data/coolify
scp /tmp/coolify-data-$(date +%F).tar.gz backup-server:/backups/
rm /tmp/coolify-data-$(date +%F).tar.gz
Updating Coolify
Coolify can update itself. A notification will appear at the bottom of the control panel if a new version is available. The update process boils down to restarting containers with new images, which usually takes no more than 30 seconds of panel downtime (your applications continue to run during this time).
9. Troubleshooting + FAQ: Solving Common Issues
Error: "Docker daemon is not reachable"
Usually occurs if the user under which Coolify is running does not have permissions to read /var/run/docker.sock. Check access rights and ensure the Docker service is active: sudo systemctl status docker.
SSL Certificate Issuance Problem
If a certificate is not being issued, check:
- Is the domain pointed to the correct IP (use
dig yourdomain.com). - Is Firewall blocking port 80 (Let's Encrypt uses it for the HTTP-01 challenge).
- Let's Encrypt limits (if you have recreated containers too often).
High RAM Consumption During Build
The build process is the most resource-intensive part. If the server "freezes" during deployment, add a Swap file:
sudo fallocate -l 4G /swapfile
sudo chmod 600 /swapfile
sudo mkswap /swapfile
sudo swapon /swapfile
echo '/swapfile none swap sw 0 0' | sudo tee -a /etc/fstab
FAQ
What VPS configuration is minimally suitable?
Minimum — 2 GB RAM and 1 CPU core. However, in this configuration, you will have to use Swap, and application building will be slow. For comfortable operation of 2-3 small applications (e.g., on Node.js or Python) and a PostgreSQL database, we recommend 4 GB RAM.
What to choose — VPS or dedicated for this task?
VPS is ideal for most projects due to scaling flexibility. You can always add resources as the load grows. A dedicated server should only be chosen if you have very heavy code compilation tasks, high disk I/O requirements, or if you plan to deploy dozens of high-load services on Coolify consuming hundreds of gigabytes of traffic.
Can I move Coolify to another server?
Yes, it is enough to copy the contents of the directory /data/coolify to the new server and run the installation script. All settings, keys, and application data will be pulled in automatically.
Is it safe to store secrets in Coolify?
All environment variables are encrypted before being saved to the database. Coolify uses standard security practices, however, it is always recommended to restrict access to the control panel itself using an IP White-list or VPN.
Need a dedicated server?
Compare prices from top providers. Configure and order in minutes.
10. Conclusions and Next Steps
We have deployed a full-fledged PaaS platform that is not inferior in capabilities to commercial clouds but runs on your own VPS. Now you can deploy applications with a simple git push without worrying about manual Nginx, SSL, and Docker network configuration.
Next steps for optimizing your infrastructure:
- Monitoring: Install the Prometheus + Grafana stack via Coolify to track your server's resource usage.
- Image Optimization: Use Multi-stage builds in your Dockerfile to reduce image size and speed up deployment.
- Clustering: Try connecting a second VPS as a Worker Node to separate the control panel and the applications themselves.
Self-hosting is a path to digital sovereignty and significant savings in the development budget. Coolify makes this path as simple and pleasant as possible.